Behind the Job
All In A Day’s Work
There is a lot of work that goes into a job before we even get on site. First-off is preparing our material; usually the architect of the project will provide us with a sample to give us an idea of what they want, and we will match the color by eye and then recreate the texture with our smooth or coarse SET plaster. Once our sample is approved, we mix all the material we’ll need for the job (there’s a lot of math involved in calculating how much that will be).

Then it’s time to pack. It's very important that we pack thoroughly, since it’s quite a hassle to go back to the studio to get anything we forgot or didn’t pack enough of, especially with a job like this where we were working in Midtown Manhattan. The supplies we need include but are not limited to trowels, paint brushes, paint rollers, tape, and of course, toilet paper.
When we get to the job site, the first thing we do is protect the area. Meaning, we tape off the ceiling and any walls we aren’t plastering, and cover the floor with paper. There are so many other things being worked on and installed around us, so we don’t want to get material where it isn’t supposed to be. We use three different types of tape for this process—our yellow tape is the strongest, we use that for taping our paper to the ground, then the blue which is your standard painter’s tape, which we’ll use over any metal or stone that needs to be covered, and then our delicate tape is purple, we use that on any painted surfaces, drywall, or plaster. Protecting the space well ensures that the job will go smoothly, it is often the most time consuming step but when done correctly it makes a world of difference in the final outcome of the project.
Once everything is taped out, it’s priming time. We use a specialized primer that we tint to match the color of our material. We roll the primer on, and do two coats.
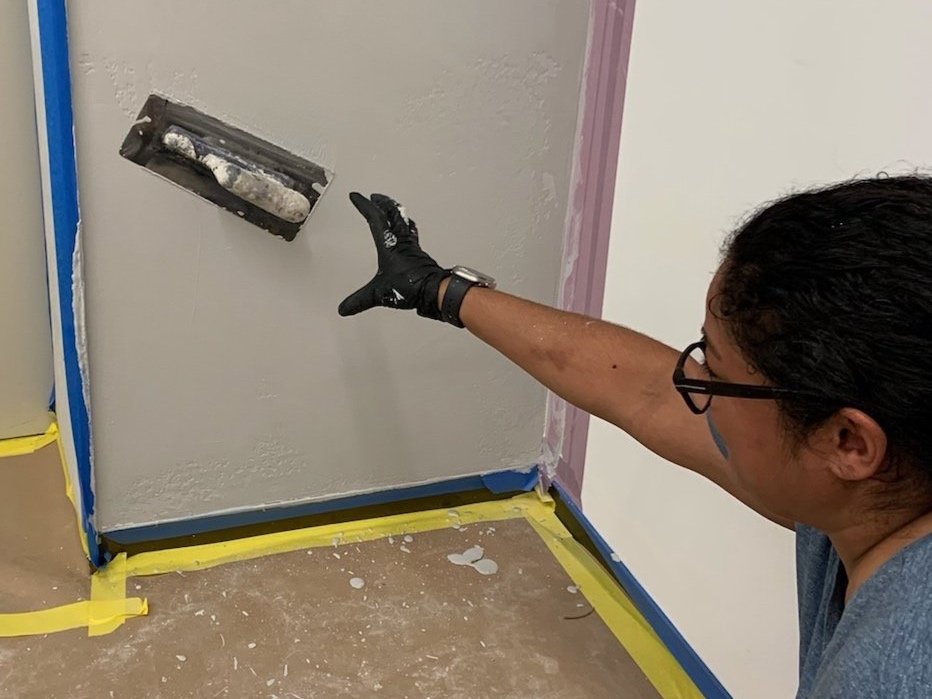
Once the second coat of primer dries, we’re ready to plaster. Since our plaster is a similar consistency to paint, we begin by rolling it on with a paint roller. We’ll roll out a section of the wall, and then it’s time to trowel and create the textured wall finish. For this particular project, the clients requested a finish that looked like concrete. We achieved that distressed, concrete-like texture by creating cratered areas in the plaster through a technique called burnishing. We usually start with the larger walls and then go back and do the smaller spaces.
The last step is to do the top coat, which for this particular job was soap-based. The top coat seals everything in and makes the color pop a bit more. Imagine a Mr. Miyagi type movement, wax on, wax off type scenario.
Once that’s done, it’s time to clean up, move out, and hope that the UberXL that we ordered is big enough to fit all our equipment.
